
Singer Heavy Duty Sewing Machine Manual: An Overview
Singer’s 4423/4432 series manuals offer comprehensive guidance‚ covering setup‚ operation‚ troubleshooting‚ and safety—essential for maximizing your sewing experience.
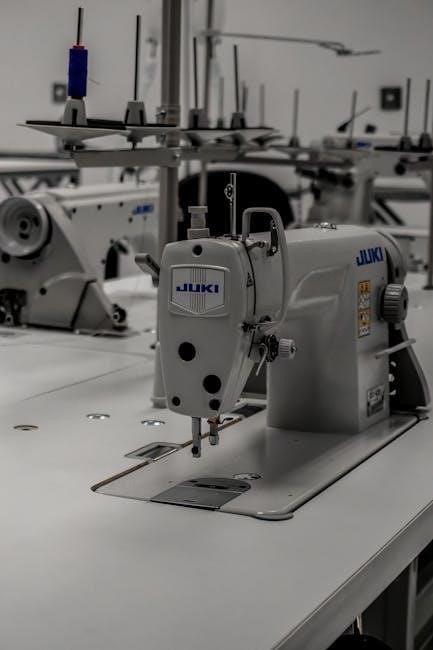
Singer’s 4423 and 4432 Heavy Duty sewing machines are renowned for their durability and ability to handle a wide range of fabrics. These models are designed for both beginners and experienced sewers‚ offering a robust construction and powerful motor. The accompanying manuals‚ available as PDFs‚ provide detailed instructions on everything from initial setup – identifying parts and winding the bobbin – to advanced techniques.
Understanding your machine’s capabilities begins with the manual. It details proper threading procedures‚ stitch selection‚ and safety precautions. Accessing the manual is straightforward‚ with options to download it directly from Singer’s official website‚ ensuring you always have a readily available resource for optimal performance and maintenance.
Understanding the Machine’s Features
Singer 4423/4432 machines boast a heavy-duty metal frame‚ ensuring stability and longevity; Key features include 23 built-in stitches‚ offering versatility for diverse projects. The manual details each stitch’s purpose and appropriate settings. A significant benefit is the machine’s ability to handle thicker fabrics‚ facilitated by its powerful motor.
The manual also explains the function of essential components like the presser feet and feed dogs. Understanding these features‚ and how to adjust stitch length and width‚ is crucial for achieving professional results. Proper bobbin winding and threading‚ as outlined in the manual‚ are fundamental to smooth operation and preventing common issues.

Setting Up Your Sewing Machine
Proper setup‚ detailed in the manual‚ involves identifying parts‚ winding the bobbin correctly‚ and precise threading—crucial steps for optimal performance and longevity.
Initial Setup and Parts Identification
Before beginning‚ carefully unpack your Singer Heavy Duty machine and familiarize yourself with all components. The manual provides a detailed diagram identifying each part‚ from the power cord and foot pedal to the presser foot‚ bobbin case‚ and needle clamp. Ensure all included accessories are present.
Correctly attaching the power cord and foot pedal is the first step. Next‚ understand the function of the sewing table and how to remove it for servicing‚ as outlined in the instructions. Identifying the feed dogs and their role in fabric movement is also vital. Knowing these parts upfront streamlines the setup process and prepares you for successful sewing.
Winding the Bobbin
Proper bobbin winding is crucial for consistent stitch quality. The Singer Heavy Duty manual details a straightforward process: place the thread spool on the spool pin‚ guide the thread through the tension disc‚ and onto the bobbin. Secure the bobbin onto the bobbin winder spindle.
Engage the bobbin winder by pushing it to the right. Press the foot pedal gently to start winding; the machine will automatically stop when full. Use only SINGER Class 15 transparent bobbins to avoid issues. Incorrect bobbin types can cause tension problems and skipped stitches‚ hindering your sewing projects. Refer to the manual’s illustrations for clarity.
Threading the Machine
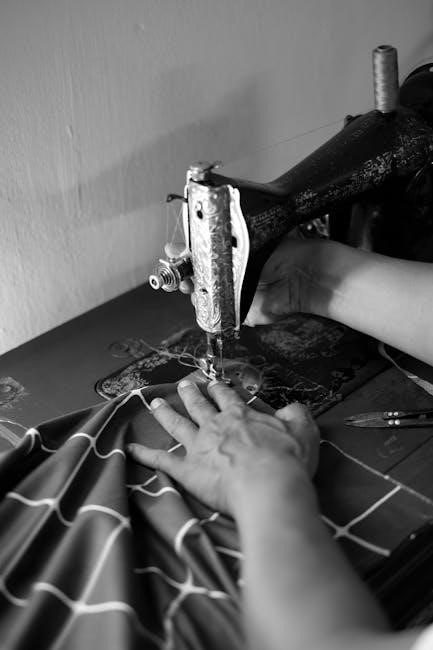
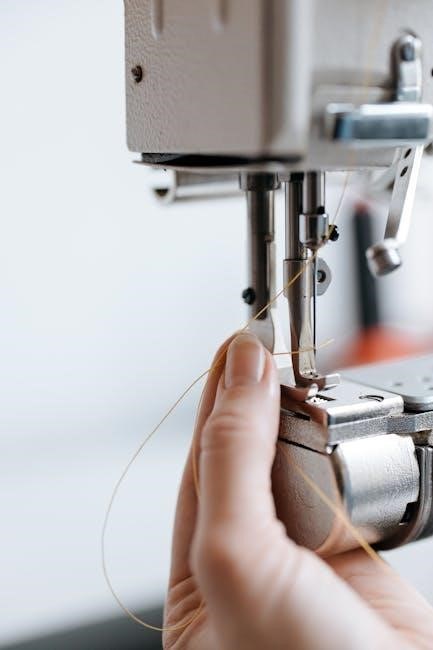
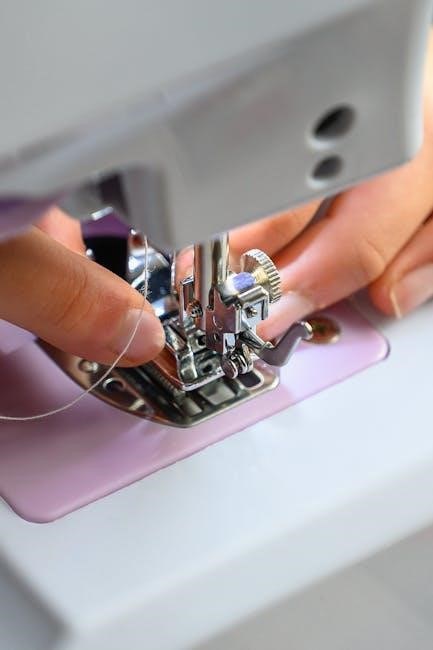
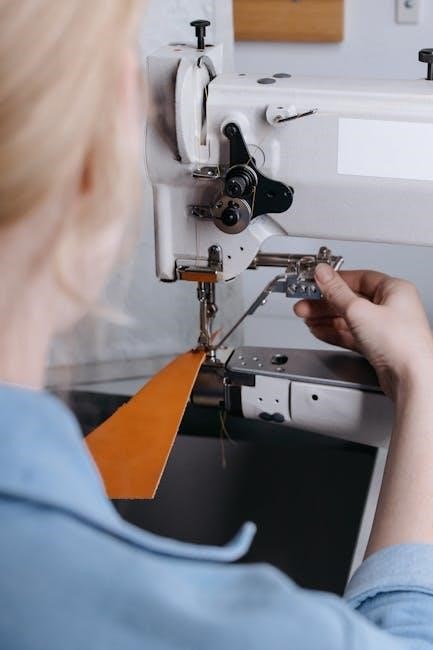
Correct threading is paramount for smooth operation. The Singer Heavy Duty manual provides a detailed‚ illustrated guide. Begin by raising the presser foot and ensuring the needle is in its highest position. Guide the thread from the spool‚ through the first tension disc‚ and down to the take-up lever.
Next‚ thread through the guide on the machine head‚ then down through the needle clamp‚ and finally‚ thread the needle from front to back. Incorrect threading is a common cause of issues; always re-thread completely if encountering problems. A properly threaded machine ensures even stitch formation and prevents skipped stitches.
Basic Sewing Operations
Mastering stitch selection‚ length‚ and width are fundamental. The manual details fabric and needle pairings for optimal results with your Singer Heavy Duty.
Selecting Stitch Types
The Singer Heavy Duty 4423/4432 offers a variety of stitch options‚ catering to diverse sewing projects. Your manual clearly illustrates each stitch and its intended use‚ from basic straight and zigzag stitches for everyday repairs and garment construction to decorative stitches for embellishment. Understanding these options is crucial for achieving professional-looking results.
Experiment with different stitch widths and lengths to see how they affect the fabric. The manual provides guidance on selecting the appropriate stitch for various fabric types and applications. Don’t hesitate to practice on scrap fabric before starting your project to ensure you’ve chosen the correct stitch for the desired outcome. Proper stitch selection significantly impacts the durability and appearance of your finished work.
Adjusting Stitch Length and Width
Your Singer Heavy Duty manual details how to precisely control stitch length and width using dedicated dials. Stitch length determines the density of stitches per inch‚ impacting fabric strength and appearance; shorter lengths for delicate fabrics‚ longer for heavier materials. Width adjustments alter the zigzag stitch’s breadth‚ useful for decorative effects or preventing fabric fraying.
Always test settings on scrap fabric before sewing your project. Incorrect settings can cause puckering‚ skipped stitches‚ or fabric damage. The manual provides recommended settings for common fabrics and techniques. Mastering these adjustments allows for customized stitching‚ ensuring optimal results for every sewing endeavor‚ and enhancing the overall quality of your creations.
Fabric Selection and Needle Types
The Singer Heavy Duty manual emphasizes matching needle type to fabric weight and weave. Universal needles suit most woven fabrics‚ while ballpoint needles are crucial for knits‚ preventing skipped stitches and runs. Denim needles excel with heavy-duty materials like denim or canvas. Stretch needles are designed for highly elastic fabrics like spandex or lycra.
Using the wrong needle can damage fabric or the machine. The manual provides a detailed chart correlating fabric types with recommended needle sizes and types. Always test on scraps first! Proper needle selection ensures smooth‚ consistent stitching and prolongs both fabric and machine life‚ leading to professional-looking results.
Troubleshooting Common Issues
The manual details solutions for needle‚ bobbin‚ and threading problems‚ plus fabric feeding issues—avoiding manual fabric manipulation for optimal performance.
Needle Problems (Bent‚ Dull‚ or Incorrect Size)
Addressing needle issues is crucial for smooth sewing. The Singer Heavy Duty manual explicitly states that a bent‚ dull‚ or damaged needle must be discarded immediately and replaced with a new one. It’s vital to use the correct needle size for the fabric being sewn; the manual provides a guide for appropriate needle selection based on fabric type.
Using the wrong size can cause skipped stitches‚ fabric damage‚ or even break the needle. Regularly inspect the needle for any signs of wear or bending. Always ensure the needle is correctly inserted into the machine‚ following the threading instructions detailed in the manual‚ as improper insertion can lead to breakage and sewing difficulties.
Bobbin Issues (Incorrect Bobbin Type)
The Singer Heavy Duty sewing machine manual emphasizes using only bobbins that are the same style as those originally included with the machine – specifically‚ SINGER Class 15 transparent bobbins. Utilizing an incorrect bobbin type can lead to significant issues‚ including inconsistent stitch formation‚ thread bunching‚ and even damage to the machine’s internal mechanisms.
Attempting to use a different bobbin can disrupt the tension balance crucial for proper stitching. Always double-check that the bobbin is correctly inserted into the bobbin case‚ following the detailed diagrams provided within the manual. Using the correct bobbin ensures optimal performance and prevents frustrating sewing problems.
Threading Errors and Solutions
The Singer Heavy Duty sewing machine manual highlights proper threading as fundamental to successful sewing. Incorrect threading is a common cause of issues like skipped stitches‚ thread breakage‚ and uneven tension. The manual provides detailed‚ illustrated steps for threading both the upper and lower threads.
If encountering problems‚ the first solution is always to rethread the entire machine completely‚ ensuring the presser foot is raised and all thread guides are correctly engaged. A bent or damaged needle can also mimic threading problems‚ so inspect and replace it if necessary. Refer to page 12 of the manual for visual guidance.
Fabric Feeding Problems (Manual Pushing/Pulling)
The Singer Heavy Duty sewing machine manual strongly advises against manually pushing or pulling fabric during sewing. This disrupts the machine’s carefully calibrated feed dog mechanism‚ potentially causing skipped stitches‚ uneven seams‚ and even damage to the machine.
The feed dogs are designed to automatically draw the fabric under the needle at a consistent rate. If you find yourself needing to assist the fabric‚ consult the manual for troubleshooting steps. Ensure the presser foot pressure is correctly adjusted and the correct needle is installed for the fabric type.

Advanced Techniques & Maintenance
Regular cleaning and oiling‚ alongside mastering reverse stitching and presser foot pressure adjustments‚ ensures optimal performance and longevity of your Singer machine.
Using the Reverse Stitch Function
The reverse stitch function‚ crucial for securing seams at the beginning and end of sewing lines‚ prevents unraveling and adds durability to your projects. To engage it on your Singer Heavy Duty machine‚ locate the reverse lever or button – typically positioned near the handwheel. Depress this lever or button before beginning to sew‚ and the machine will automatically stitch in reverse.
Release the lever/button to return to forward stitching. Many models allow you to stitch continuously in reverse‚ while others require re-engaging the function for each short reverse stitch sequence. Practice using the reverse function on scrap fabric to become comfortable with its operation and achieve neat‚ secure seam finishes. Remember to always reinforce the beginning and end of each seam with a few reverse stitches!
Adjusting Presser Foot Pressure
Proper presser foot pressure is vital for achieving even stitches and preventing fabric slippage or puckering. The Singer Heavy Duty machines typically feature a dial or adjustment screw to control this pressure. Lower pressure is ideal for lightweight or delicate fabrics‚ allowing them to feed easily without distortion. Conversely‚ increase the pressure for thicker or multiple layers of fabric to ensure consistent feeding.
Experiment with different settings on scrap fabric that closely resembles your project material. Insufficient pressure can cause skipped stitches‚ while excessive pressure may leave indentations or damage the fabric. Regularly check and readjust the pressure as you change fabric types to maintain optimal sewing performance and achieve professional-looking results.
Cleaning and Oiling the Machine
Regular cleaning and oiling are crucial for maintaining your Singer Heavy Duty sewing machine’s performance and longevity. Lint and dust buildup can cause friction‚ leading to skipped stitches and potential damage. Always unplug the machine before cleaning! Use a brush to remove lint from the bobbin area‚ feed dogs‚ and other accessible parts.
Apply a few drops of sewing machine oil to the designated oiling points‚ as indicated in your manual – typically around the bobbin case‚ hook‚ and motor. Avoid over-oiling‚ as excess oil can attract more lint; Wipe away any excess oil with a clean cloth. Consistent maintenance ensures smooth operation and prevents costly repairs.

Safety Precautions
Always unplug the machine before cleaning or changing parts‚ and never operate it with a damaged cord. Prioritize electrical and general safety!
General Safety Guidelines
Before operating your Singer Heavy Duty sewing machine‚ carefully review all safety instructions within the manual. Keep the machine in good working order through regular cleaning and maintenance. Never leave the machine unattended while it’s running‚ and always disconnect it from the power source when not in use or during servicing.
Avoid sewing over pins or thick layers of fabric‚ as this can damage the needle and machine. Keep fingers away from the needle area while sewing. Ensure the area around the machine is well-lit and free of obstructions. Children should never operate the machine‚ and adult supervision is crucial when teaching others. Always use the correct needle for the fabric type to prevent breakage and potential injury.
Electrical Safety Information
To ensure safe operation‚ always verify your power supply matches the machine’s voltage requirements. Never operate the sewing machine with a damaged cord or plug; replace them immediately. Avoid using extension cords if possible‚ and if necessary‚ ensure they are appropriately rated for the machine’s power consumption.
Do not expose the machine to moisture or operate it outdoors. Disconnect the machine from the power outlet before cleaning‚ changing the needle‚ or performing any maintenance. Never attempt to repair the machine yourself; contact a qualified technician for assistance. Grounding is essential for electrical safety – do not bypass this feature. Always unplug before leaving the machine unattended.
Accessing the Manual & Support
Download the Singer 4423 manual in PDF format online‚ or access official Singer support resources for assistance and replacement parts if needed.
Downloading the PDF Manual
Locating your Singer Heavy Duty 4423 or 4432 sewing machine’s manual in PDF format is remarkably straightforward. Numerous websites host downloadable versions‚ offering convenient access to instructions directly from your computer or mobile device. A quick online search for “Singer 4423 manual PDF” will yield several results‚ including links to official Singer resources and reputable sewing machine information sites.
These digital manuals encompass all the information found in the printed version‚ detailing everything from initial setup and threading procedures to troubleshooting common issues and performing routine maintenance. Downloading the PDF allows you to easily search for specific topics‚ print individual pages‚ or view the manual on the go‚ ensuring you always have the guidance you need at your fingertips.
Singer’s Official Support Resources
Singer provides a wealth of support resources for owners of the Heavy Duty 4423 and 4432 sewing machines. Their official website features a dedicated support section with frequently asked questions (FAQs)‚ troubleshooting guides‚ and downloadable manuals. You can also access helpful video tutorials demonstrating various sewing techniques and machine maintenance procedures.
For personalized assistance‚ Singer offers customer service via phone and email. Their knowledgeable representatives can address specific questions‚ provide guidance on resolving issues‚ and assist with locating replacement parts. Exploring these official channels ensures you receive accurate and reliable support directly from the manufacturer‚ maximizing your sewing machine experience.
Finding Replacement Parts
Locating replacement parts for your Singer Heavy Duty 4423 or 4432 is crucial for maintaining its performance. Singer’s official website offers a parts search tool‚ allowing you to identify components using your machine’s model number. Alternatively‚ authorized Singer retailers and service centers can assist in sourcing the correct parts.
Commonly needed replacements include needles‚ bobbins (specifically Class 15 transparent)‚ and presser feet. When ordering‚ ensure compatibility with your machine model to guarantee a proper fit and function. Utilizing official channels or reputable retailers ensures you receive genuine Singer parts‚ preserving the quality and longevity of your sewing machine.
Understanding Machine Components
Key components like presser feet and feed dogs work together‚ while the internal mechanism ensures smooth fabric feeding during sewing operations.
Detailed Look at the Presser Feet
The Singer Heavy Duty sewing machine utilizes various presser feet for diverse sewing tasks. Understanding each foot’s function unlocks greater creative potential. A standard presser foot is ideal for everyday sewing‚ while a zipper foot facilitates close-stitch zipper applications. Buttonhole feet automate buttonhole creation‚ ensuring consistent results.
Furthermore‚ a rolled hem foot creates delicate‚ finished edges on lightweight fabrics. The open toe foot provides enhanced visibility for decorative stitching and appliqué work. Regularly inspecting and cleaning presser feet ensures optimal performance and prevents fabric snagging. Proper foot selection significantly impacts stitch quality and project outcomes‚ making it a crucial aspect of mastering your sewing machine.
The Role of the Feed Dogs
Feed dogs are essential components beneath the needle plate‚ responsible for advancing fabric smoothly during sewing. These toothed metal pieces grip the fabric and move it consistently‚ eliminating the need for manual pulling or pushing. Maintaining clean feed dogs is crucial; lint and debris can hinder their function‚ leading to uneven stitching or skipped stitches.
The manual emphasizes not manually manipulating the fabric while sewing‚ as this disrupts the feed dogs’ controlled movement. Adjusting feed dog height‚ if available on your model‚ allows for thicker fabrics or specialized techniques. Understanding their role ensures consistent stitch length and overall sewing precision‚ contributing to professional-looking results.
Internal Mechanism Overview
Singer Heavy Duty machines feature a robust internal mechanism designed for durability and power. The motor drives a series of gears and linkages‚ ultimately controlling the needle’s up-and-down motion and the feed dogs’ fabric advancement. The hook assembly‚ located beneath the needle plate‚ interlocks with the upper thread to form stitches.
Regular cleaning and oiling‚ as detailed in the manual‚ are vital for maintaining this intricate system. Proper lubrication minimizes friction‚ preventing wear and tear on internal parts. Understanding this basic overview helps appreciate the machine’s engineering and reinforces the importance of preventative maintenance for long-lasting performance.
Leave a Reply